What to Consider When Mounting Lights to an MSR
By Scott E. Mayer
Lights on any firearm are used for a variety of tasks: navigation, searching, disorienting, blinding and target identification to name a few. If you’re reading this article, it’s fair to say you’re interested in modern sporting rifles (MSRs) — and that’s great because MSRs are tailor-made for mounted lights. Indeed, these days, you’re more likely to come across an MSR fully equipped with anywhere from one to four accessory rails and if not they are easily added.
There are several things to consider when purchasing a gun-mounted light, but I think the primary ones are your decision on where to mount your light, how you’ll activate it and its output. Let’s look at each.
3, 6, 9 and 12 O’Clock
Since rails are so versatile, you have lots of options when it comes to where to mount a light on a MSR. I’ve noticed many MSR owners mount their light at either the 3 or 9 o’clock positions, depending on if they’re right- or left-handed shooters and sometimes depending on how the light is activated. If you’re a right-hand shooter, you might want the light mounted on the right side of the gun so it’s not rubbing against your hand on the forearm constantly. The downside is that position leaves the light as the outermost part of the gun where it can snag and hit things.
One of the concerns I see with a side-mounted light is that if you’re cornering, the light could be on the wrong side of the gun. If it’s mounted on the right and you’re coming around a right-turn corner, most of the light will hit the opposite wall, reflect back and illuminate you. “Rolling the gun,” a technique taught at some schools where you stand back from the corner and minimally bend your upper body as you see into a room, can minimize that, but the real solution is a matter of seeking out an experienced trainer who teaches side-mounted light techniques.
I recently saw a persuasive argument for having the light mounted at 12 o’clock — on top of the gun. In that position, the light is completely ambidextrous with respect to activation, and it also minimizes the amount your exposure when maneuvering around a corner or when shooting over something. The downside is that it has to be mounted low enough that it doesn’t obscure your sights. You must also be cognizant of “offset.” Offset” is the distance between the center of the bore and the center of the light, regardless. Because of offset, very close shots — which will be typical in a home-defense situation — will hit low at a distance comparable to the offset amount.
In other words, if you haven’t trained to understand offset, your shots will likely not hit your intended target.
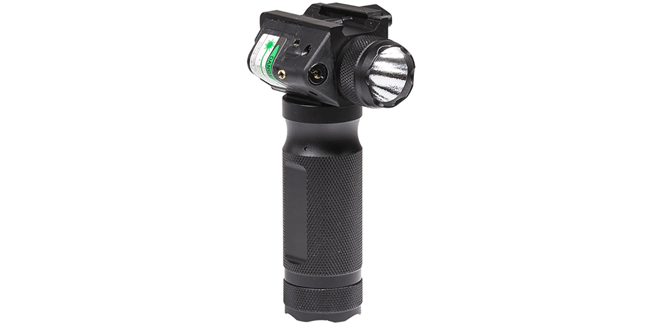
Finally, there’s the case for mounting a light at the 6 o’clock position or having one integral with a vertical fore-end grip. As with the 12 o’clock position, this is equally ambidextrous, though you either have to roll yourself out more when going around a corner or seek out a different approach to minimize your exposure and don’t have the light reflecting back from a wall onto you.
Regardless which light-mounting position you choose, and I really think position is a matter of preference and then training, it’s best to mount the light as far forward as possible to minimize the size of the shadow that will be cast by any part of the gun that’s forward of the light. That said, you don’t want it so far forward that it could be damaged by muzzle blast or so that it throws the gun so off-balance for you that you can’t handle it safely or effectively. You also want a bomb-proof mounting system, one that can take getting banged against furniture and that stays tight under repeated recoil.
On and Off, Off and On
Activation is all about how you turn the light on and off and you’ll want that operation to be as simple and integrated with your grip as possible. You don’t want your attention to be on flipping switches or turning bezels.
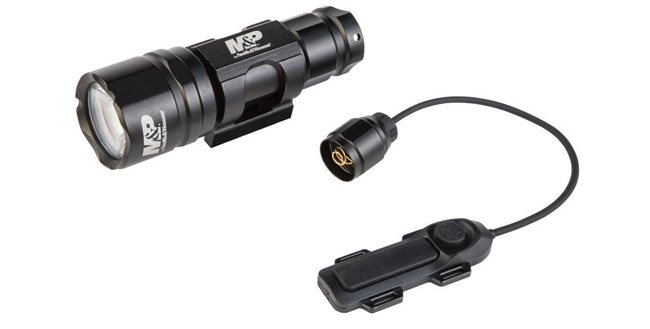
A popular activation option is a pressure pad that offers momentary on/off capability by simply pressing the pad. Some of these will have a secondary “on” button. Pads should be positioned so that you can activate them using either hand and should be mounted very securely. That mounting is often as simple as a stick-on with tape, but I’ve found that very unsatisfactory. I’ve often removed a gun from my safe to find the stick-on pad dangling loose. Better are the ones that strap on, and even better are the ones that use both the tape and straps.

Pressure pads should be mounted as securely as the light so they don’t pop off unexpectedly. Wires should secure positively to the light and be secured so they don’t catch on things.
One consideration with pressure pads is that they have to integrate with the light somehow and that usually means a wire that also has to be secured. A wire can come unplugged from the light if it catches on something, so you’ll want to firmly secure it’s attachment to the light as well.

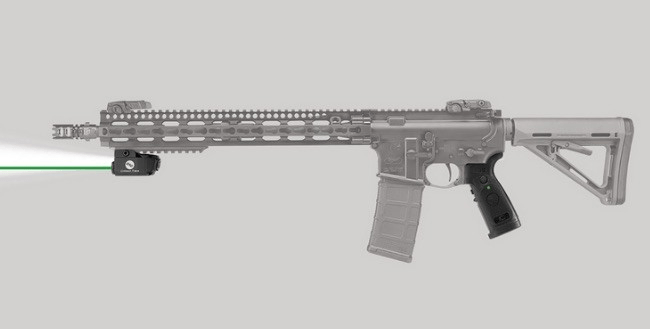
Wireless integration, here from Crimson Trace, between the activation switch and light is the latest in mounted light technology. Who knows what this means for the future.
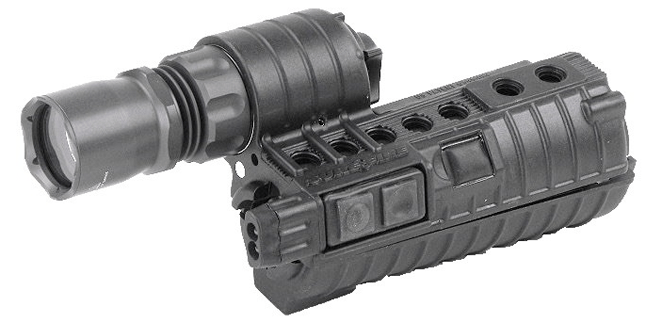
Crimson Trace recently took an innovative approach to activation integration with a wireless system (seen in the lead image for this article on a Smith & Wesson M&P rifle), in which a pressure pad in the MSR grip sends the on/off signal wirelessly to the light. Clever. Others, such as Surefire, came up with complete replacement fore-ends that have the light and pressure switch built in, similar to what you would find with a vertical fore-end grip with integral light.
Another popular activation is a tail-cap button. Tail caps take a little more training to use effectively, and they are a little less ambidextrous, but there’s less that can go wrong as far as activation and problems with wires and attachment.
Hi, Low and Disco Modes
One thing that can go seriously wrong regardless of which activation type you use is having an overly complicated flashlight with multiple modes that are too easily switched. I’m not saying it’s wrong to have a light with high and low outputs or even strobe. What I am saying is that if your light has multiple functions, make sure it’s set on the mode you want and stays there. I’ve seen ones that always default to bright when turned on or that change modes with two quick presses of the switch — and in a home-defense situation were nerves are jangled, that can easily happen. If it defaults to bright, you could compromise your night vision, and depending on your situation can certainly give away your position.
One more thing to keep in mind is that output is more than just brightness. The fringe, or corona, of a light is important to seeing peripheral threats. If a light has too bright and small a center “hot spot,” it could tunnel your attention to just that spot.
Ultimately the type of light, whether to mount or not and if so where to mount, comes down to what you’re comfortable with and the training you can find. That training is key to safe and effective handling of your firearm at a time when you most need it. There are a number of highly regarded self-defense training schools in this country, including Gunsite Academy, Thunder Ranch and Academi to name a few, and many of NSSF’s Five-Star indoor ranges offer advanced tactical training. Do some homework, set aside the funds to travel to a school you find will meet your needs if necessary, and get the training to advance your skills to the next level. You may never need them — but you won’t be sorry you spent either the time or money if you do.
In this video, Gunsite Academy instructor and gunsmith Cory Trapp discusses important considerations you should have when outfitting and accessorizing your AR-15 modern sporting rifle.
You may also be interested in:
https://www.letsgoshooting.org/2016/01/28/why-you-should-consider-buying-laser-sights/

