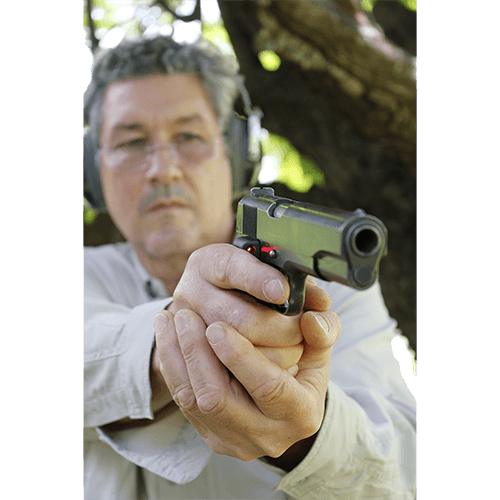
The shot missed most often in pistol shooting is the very first shot of a string of fire. One of the best ways to correct this is to make first shots the majority of your practice. This drill will help.
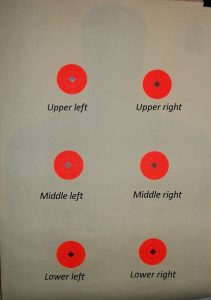
For this exercise you will need to take any large target and turn it over. Trace or paste up six three-inch circles spaced several inches and evenly apart in three rows of two target circles each. You will also need a magic marker for later in the drill.
 At the range, tack up your target at the 10-yard marker. The shooting drill will take 48 rounds to complete. A friend with a whistle or a beeper can be helpful, or you can use a timer and beeper you can set yourself to go off. Here’s how it goes:
- Starting with both hands gripping the pistol as you normally would, aim the gun at the bottom of target backer. At the signal from a whistle or a timer beeper, raise the gun to your normal aiming position and fire one shot on the upper left Return your gun to the ready position aiming at the bottom of target and decock, if your pistol has a decocker. Repeat the drill on the upper right target, then left and right for the second and third rows, one shot on each circle, again, with your handgun being returned to the ready position for at the base of the target after each single shot is fired.
- Repeat the drill with your firearm held “compressed ready”—gun held pointing at the target, but held close to the chest, elbows bent. At the signal, push the gun out to your normal firing stance and fire one shot on upper right Return to compressed ready and repeat with one shot on the upper left dot, and again for the remaining target circles, working right to left for all three rows. (Remember also to decock after every shot, if your pistol has a decocker).
- Starting with pistol aimed at bottom of target backer, fire one shot on the middle left dot, then one shot on middle right dot. Return to bottom of target and decock if your pistol has a decocker. Repeat twice more, working your choice of the bottom or top row and finishing with the remaining two targets, but working left to right no matter which row you choose to shoot after first completing the middle. Again, the starting position for each shot is with the gun aimed at the base of the target.
- This next string works as an opposite to the string in No. 3. Starting with pistol aimed at bottom of target, fire one shot on the middle right Return to the ready position, decock if necessary, then raise the gun and fire one shot on the middle left dot. Pick the row opposite from the row you fired second in string No. 3, then finish with the remaining row. Again, return the gun to aiming at the bottom of the target backer after each shot.
- Starting with pistol at compressed ready, fire one shot on the bottom left dot, then one shot on the bottom right dot. Return to compressed ready and decock your pistol if necessary. Repeat with the middle row, then finally the top row, bringing the handgun back to the compressed ready position (and decocking if necessary) after each shot.
- Repeat string No. 5 but working in the opposite direction, firing at the bottom right circle first, then the bottom left, repeating with the middle and then the top rows, moving the gun to compressed ready (and decocking if necessary) after each shot.
- Mark all the hits on your target with a magic marker.
- On the dot where you had the least hits, i.e., your worst group, fire six individual aimed shots, resting between each shot in either compressed ready or with the handgun aimed at the bottom of the target backer.
- On your second-worst group, fire a six-shot slow fire group as one (slowly fired) string of shots without returning to the resting position after each shot. That concludes the drill.
You will find that your marksmanship improves much faster when you concentrate on your first shot and you can tell where each shot goes. If you struggled with this drill overall at 10 yards, move your target back to seven or even five yards. Too easy, move the target back to 12 or 15 yards. A smartphone-compatible copy of this drill is available for download on the Tactical Professor website www.tacticalprofessor.com.


